Every year, Trevor and I make Amelia’s birthday cake. For her first birthday, we made a teapot (that was so hard!!). 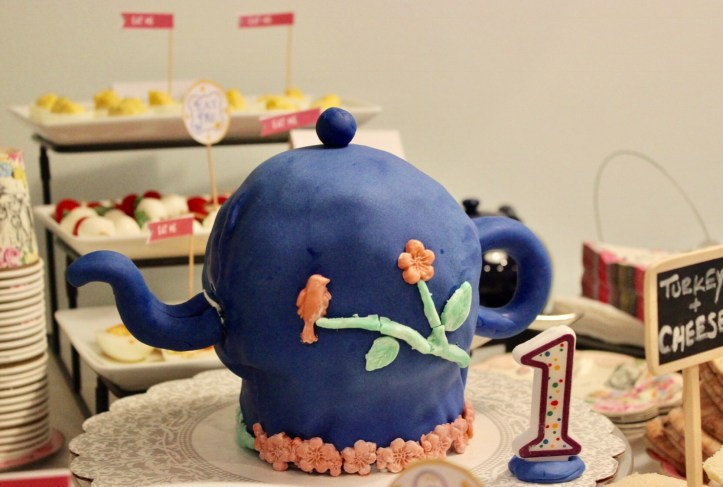
For her second birthday, we made a bear cake. It was cute, but messy and she loved it. 
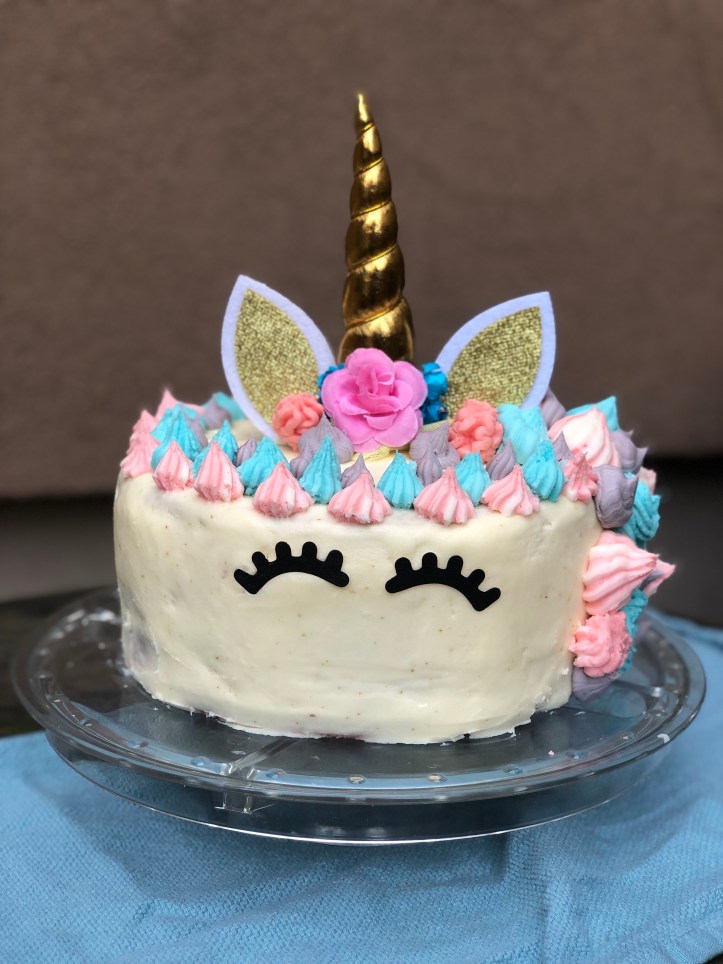
Today is Amelia’s 3rd birthday and she wanted a rainbow unicorn cake.
So, we set out on the journey of making a unicorn cake using a Baked By Melissa’s Tie-Dye cake recipe as the base for the cakes. Tie-dye is easier than rainbow, so we went with it! It took us a while to figure out how we wanted the tie-dye to look, but that’s what makes it special and imperfect.
We made the cakes the day before and let the cakes cool over night. In the morning, we made and colored the frosting. We layered the cake high and froze it while we made another batch of frosting for the flowers we piped on. We piped the flowers on and it looked great.
Then…. there was the horn & ears. We tried so to make the horn out of fondant and just couldn’t get it right. So, we bought the horn. I know, I know, that’s not totally cool, but sometimes, you have to know when to cut your loses. We made the entire thing outside of the horn/ears, so we were ok with the one store-bought decoration (here’s the one we bought). If you want to make the horn, here is the tutorial we followed.
Here is my #1 learning from making her cakes every year with Trevor: Amelia doesn’t care about perfection. Whatever we make is beautiful and amazing in her eyes, so just remember that when you’re trying this or any other recipe out!
Amelia's Tie-Dye Unicorn Cake
Ingredients
For the cake (double this if you want to make 3 or 4 layers):
- 1/2 pound (2 sticks) unsalted butter
- 2 cups granulated sugar
- 2 teaspoons pure (or homemade) vanilla extract
- 4 large eggs
- 3 cups all-purpose flour
- 2 teaspoons baking powder
- 1/4 teaspoon sea salt
- 1 3/4 cups whole milk
- Food coloring – colors of your choice
For the frosting:
- 2 boxes (about 7 cups) confectioners sugar
- 1 cup (2 sticks) butter, softened
- 6-8 tablespoons milk
- 2 teaspoons vanilla extract
- Food coloring – colors of your choice
Directions
- Preheat the oven to 350 degrees. Butter two, 9-inch round cake pans or line them with wax paper/parchment paper and butter the paper.
- With a hand mixer or a stand mixer fitted with the paddle attachment, whip the butter for 1 minute on high speed, then scrape down the sides of the bowl with a spatula. Add the granulated sugar and beat on high speed for 2 minutes. Scrape down the sides of the bowl again. Add the vanilla extract. While mixing at medium-low speed, add the eggs one at a time. Scrape down the edges of the bowl midway through.
- Combine the flour, baking powder, and sea salt in a separate bowl. With the mixer on low speed, add half the flour mixture. When it’s mostly incorporated, add half the milk. Add the remainder of the dry and wet ingredients, scraping down the sides of the bowl between additions. Stop mixing as soon as you have a smooth batter.
- Divide the cake batter evenly among 5 small bowls. Add food coloring to each bowl–1 drop at a time–until the desired intensity of each color is reached. Scoop each color into a disposable pastry bag and snip the tip of the bag. I tie the ends of the pastry bags with plastic wrap or rubber bands to keep the batter in. Pipe the batter into the first pan, one color at a time, one over the next. (You could also use a spoon, but the pastry bags make this much easier.) Repeat with the remaining pan.


- To make the tie dye effect, carefully drag a skewer completely through the batter from the center out to create a pattern with the colors. Don’t overmix the colors.
- Bake until the middle of the cake feels springy when you gently press your finger against it, 35 to 40 minutes. Set the cakes aside to cool completely before frosting (once cooled, I put ours in the freezer so it was easier to frost).


- To make the frosting: in a large bowl, with electric mixer at low speed, combine sugar, butter, milk and vanilla. Beat at medium speed 1 to 2 minutes, until creamy. If desired, add more milk until frosting is spreading consistency.
- To assemble the cake once cooled, level the cakes with a serrated knife. Place one layer on a cake turntable and frost the top with the vanilla frosting. Add the second cake layer and frost the top. Place the third layer on top upside down so the the flat bottom becomes the top. Gently dollop more frosting on top of cake and spread a thin layer on top and down the sides of the cake until smooth.


- To decorate the cake, divide remaining pastry into small bowls and color with food coloring one drop at a time until desired color is achieved. Add each color into a pastry bag with different flower shaped tips.
- Attach horn & ears (if using store-bought) to top of cake with toothpicks (or here’s how to make one out of fondant) and pipe alternating colors of flowers around the top and down the right side of the cake to make the mane. Once fully decorated, attach or draw eyelashes on.
- Place cake on cake platter and celebrate! Enjoy!